Server Integration
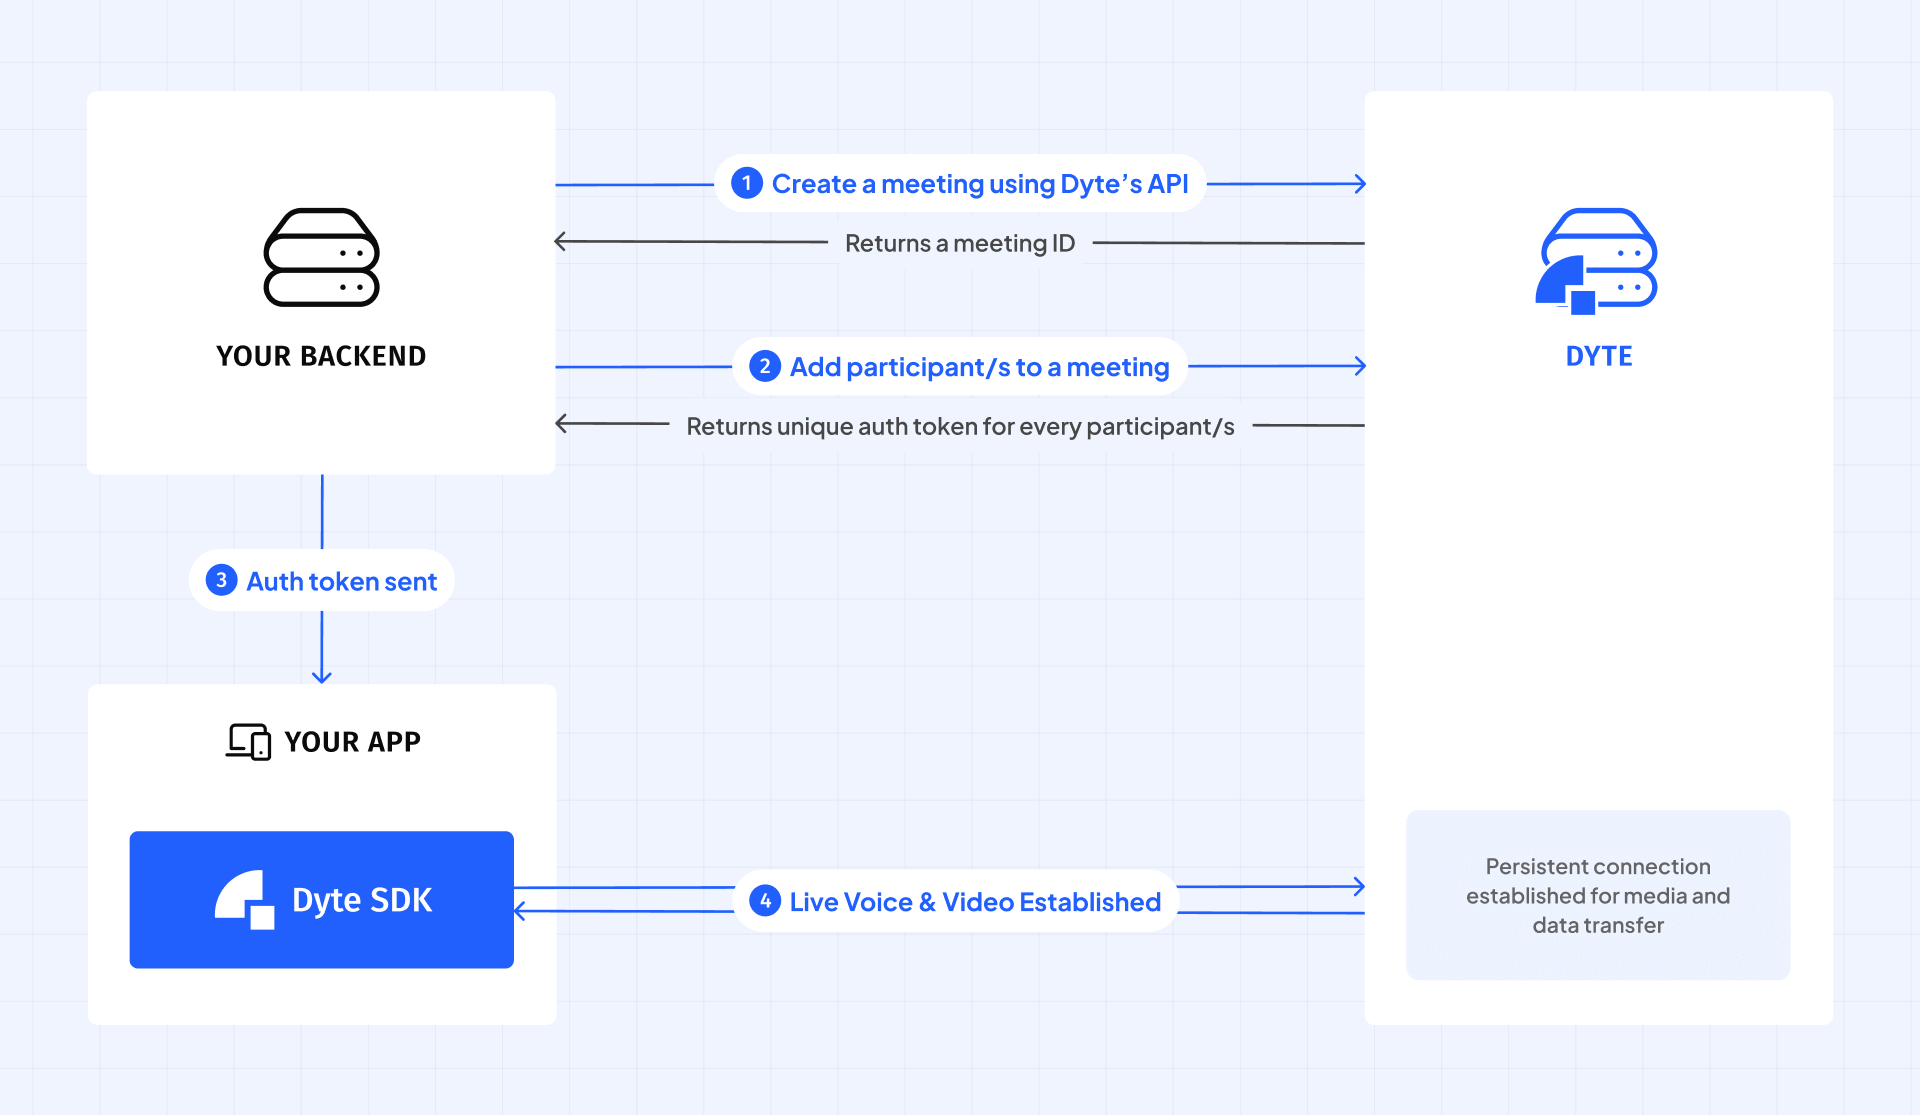
It all starts with creating a meeting which is needed to start a live video call. After a meeting has been created on Dyte's server, you can now add participants to the meeting. Each participant is given an authToken which is necessary for your client side to further interact with the meeting.
To learn move about these terms, refer to our Concepts page.
Let's dive into further details.
Step 1: Create a meeting
There are two ways to go about creating a meeting.
Create a Dyte meeting using the Create Meeting API. The API returns a unique identifier for your meeting which you will be using later.
If you are going for a no-code integration, you can also create a meeting using the Developer Portal and copy the unique identifier for the meeting.
Dyte meetings do not have a specific date or time associated to them, so you can either create them in advance or right when users need to join the meeting.
Step 2: Add Participants
Now that you have a meeting, it's time to add participants to the meeting. There are two ways in which you can add participants to a meeting:
Call the Add Participant API with the unique identifier of your meeting. To specify the preset that your participant should use, remember to pass the
preset_nameparameter as well.Similar to creating a meeting, you can also add participants to the meeting through the Developer Portal and share the
authTokenwith the respective participants.
On successfully creating a participant, you will receive an authorization token (authToken) for each participant. Your server has complete control over when to distribute this token to the participants. Your client side needs the authToken to connect and interact with the meeting.
What's Next?
You have completed the basic steps needed to integrate dyte on the server side. Now, you can move now to integrating dyte on your client side or you can learn more about the different REST APIs that Dyte provides and how you can utilise them.