Quickstart
This quickstart shows how to use Dyte's iOS UI Kit SDK to add live video and audio to your iOS applications.
For getting started quickly, you can use our sample code. You can clone and run a sample application from the iOS UI Kit Sample App GitHub repository.
Objective
You'll learn how to:
- Install the Dyte SDK
- Initialize the SDK
- Configure a Dyte meeting
- Launch the meeting UI
Before Getting Started
Make sure you've read the Getting Started with Dyte topic and completed the steps in the Integrate Dyte section. You must complete the following steps:
- Create a Dyte Developer Account
- Create a Dyte Meeting
- Add Participants to the meeting. This API returns the authentication token that is required to initialize your frontend SDKs.
Step 1: Install the SDK
CocoaPods
- Add the following line to your
Podfile.
pod 'DyteUiKit'
- Install the client SDK as a CocoaPods dependency.
pod install
Swift Package Manager
AddDyteUiKitSDK through Swift Package Manager in Xcode. Use https://github.com/dyte-in/ios-uikit-framework.git as the package source.
- Add the necessary fonts and permission entries in the
info.plistfile. You can customize the strings shown in the permission pop-ups to match your audience preferences.
<key>NSBluetoothPeripheralUsageDescription</key>
<string>We will use your Bluetooth to access your Bluetooth headphones.</string>
<key>NSBluetoothAlwaysUsageDescription</key>
<string>We will use your Bluetooth to access your Bluetooth headphones.</string>
<key>NSCameraUsageDescription</key>
<string>For people to see you during meetings, we need access to your camera.</string>
<key>NSMicrophoneUsageDescription</key>
<string>For people to hear you during meetings, we need access to your microphone.</string>
<key>NSPhotoLibraryUsageDescription</key>
<string>For people to share, we need access to your photos.</string>
<key>UIBackgroundModes</key>
    <array>
        <string>audio</string>
        <string>voip</string>
        <string>fetch</string>
        <string>remote-notification</string>
    </array>
The UIBackgroundModes key is used in the Info.plist file of an iOS app to declare the app's supported background execution modes. This key is an array of strings that specifies the types of background tasks that the app supports. By declaring the background modes, the app can continue to run in the background and perform specific tasks even when it is not in the foreground.
It's important to note that the use of background modes should be justified and comply with Apple's App Store Review Guidelines. Apps that misuse background modes or unnecessarily run in the background may be rejected during the app review process.
Sources: Apple Developer Documentation: Declaring Your App's Supported Background Tasks
Step 2: Configure a Dyte meeting and Launch UI
To set the initialization properties in the DyteUiKit class, simply initialize DyteMeetingInfoV2 and provide the participant's authToken. You can get the authToken via the Add Participant API.
Try this in viewDidAppear()
import DyteUiKit
import DyteiOSCore

class ViewController: UIViewController {

    override func viewDidLoad() {
        super.viewDidLoad()
    }
    var dyteUikit: DyteUiKit!

   override func viewDidAppear(_ animated: Bool) {
        super.viewDidAppear(animated)
        dyteUikit = DyteUiKit(meetingInfoV2: DyteMeetingInfoV2(authToken: authToken, enableAudio: true, enableVideo: true, baseUrl: Constants.BASE_URL))
        let controller = dyteUikit.startMeeting {
            [weak self] in
            guard let self = self else {return}
            self.dismiss(animated: true)
        }
        controller.modalPresentationStyle = .fullScreen
        self.present(controller, animated: true)
    }
}
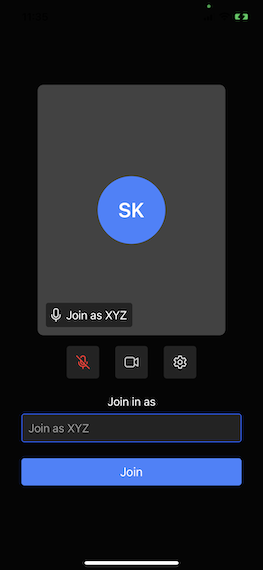
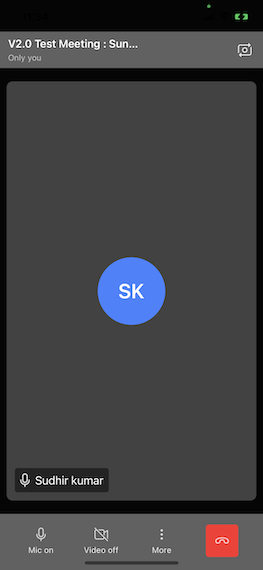
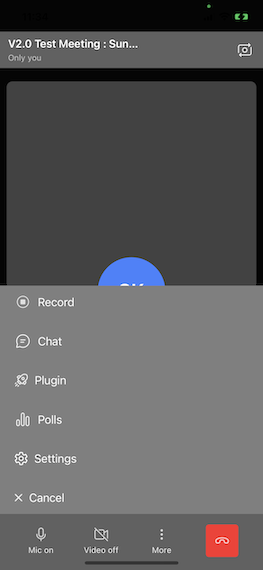
Here's a visual representation of all the configuration options described.